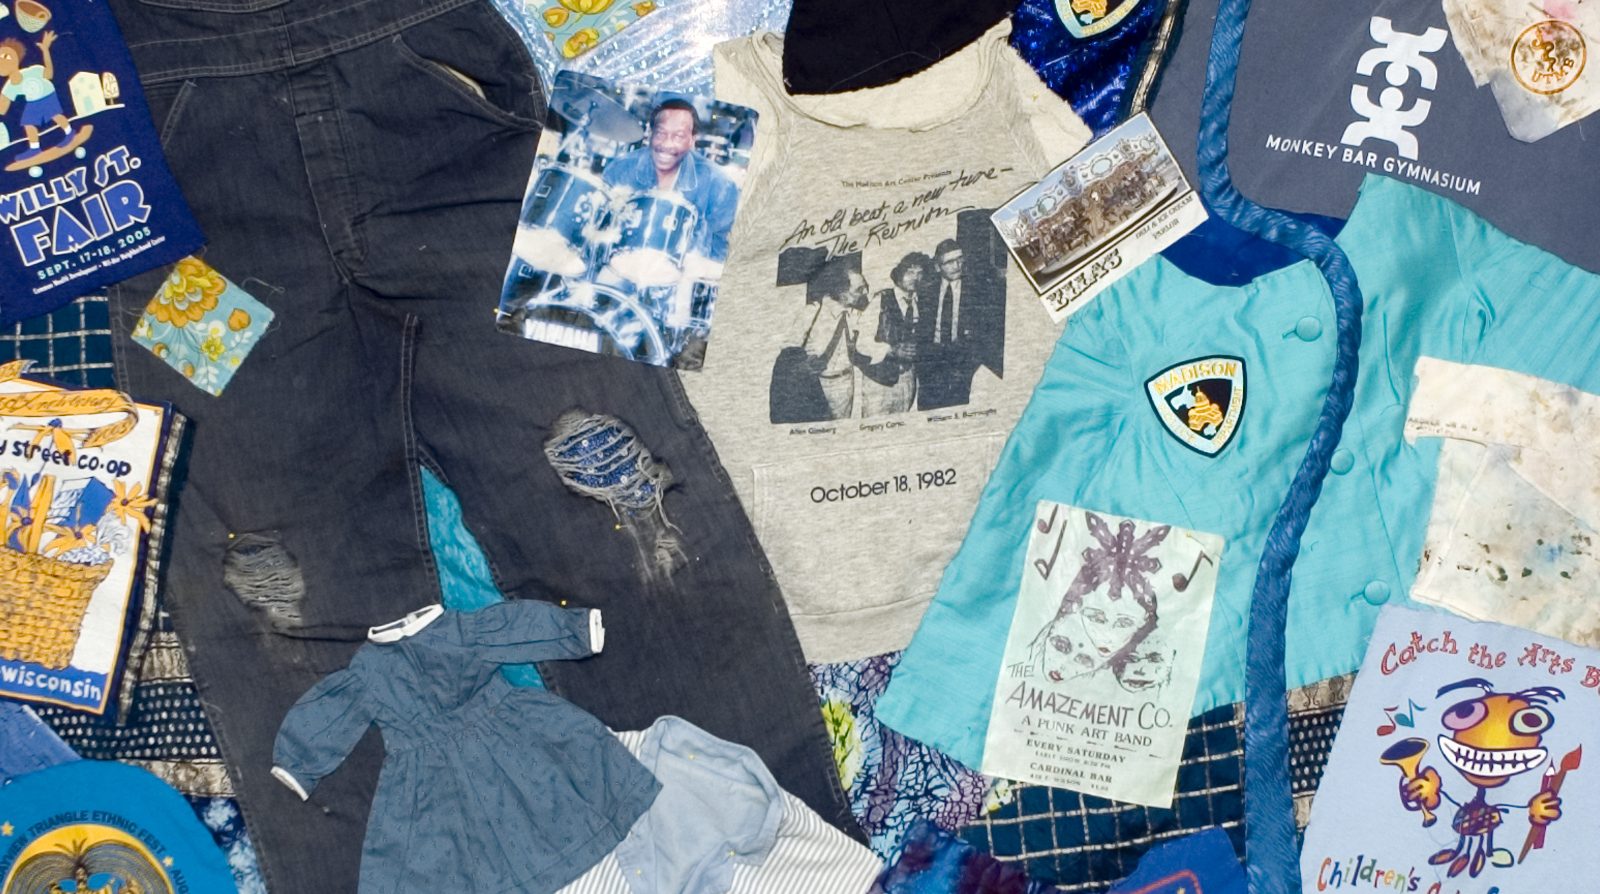
A Fabrication is a fabric collage which incorporates pieces of clothing and related items such as hats, gloves, slippers, belts and jewelry into a design. It can serve as a “memory quilt” in which families, classrooms or communities can create visual repositories for collected treasures and heirlooms. I believe that a human “essence” lingers on the clothing and related items that we use. My intention in creating Fabrications is to evoke that human presence. Another intention is to create a pleasing composition, as with all art. Since a Fabrication is hand-sewn, it connects us with generations of sewers, from many cultures, who create beauty with a needle and thread. By hanging these often anonymous bits of sometimes exquisite handiwork on the wall, we are saying “this work, often made by women, matters.”
To make a Fabrication of your own, begin to collect items which you want to include in your Fabrication. Organize your items. I usually do this according to color combinations. Decide on a size for your Fabrication. The size of your work can be dictated by the space in which it will hang, by an available frame you want to use, or by the amount of materials you collect.
When planning your Fabrication, consider that your overall composition is made of lines, shapes and colors. Pay attention to all of these elements. Consider that your items will probably be of varying textures, sizes and shapes. Therefore, an asymmetrical composition might be more easily achieved than a symmetrical one. Fabrications can be surprisingly abstract. Even an asymmetrical composition includes its own inherent balance. Some items you use will come in 2’s – such as slippers. Some might come in 3’s – such as hats. Triangles within compositions can be strong design elements.
Color is the strongest design element for most of us. Know how many colors you can successfully combine. Monochromatic compositions can be wonderfully successful. Two-color compositions can be particularly strong – think of black and white, red and white. I feel that I can successfully combine up to four colors – more than that is quite a challenge. Use color wisely.
The first step in constructing your Fabrication is to choose a background fabric. The background fabric needs to be heavy enough to support the weight of the objects you will be sewing to it, without sagging or puckering. I usually choose a durable, fairly stiff fabric that can be sewn easily, but that does not stretch easily. I often use duck or a lighter weight canvas. I use a black background for black pieces, and white for almost all other colors or color combination. The background usually does not show.
How big your background fabric should be is determined by the size of the piece itself. Leave at least at least 6″ for stretching inside a frame, or 2″ for binding, on all sides of your piece, depending on how you will finish the piece.
To compose your piece, lay your background fabric out on a horizontal surface. Place items in a way that is pleasing to you. Approach your piece as if you are the conductor of a symphony and the items are individual musical instruments. Feature all instruments, yet achieve a good overall tone. Use various related scraps of fabric, from clothing or not, to fill in behind the items you are highlighting. Pay attention to the combinations of texture. Texture will give your piece richness and depth.
Pin as much as you possibly can pin in place. Hang your composition vertically, as often as possible, while you are sewing it. Stand back and observe it. Change what needs to be changed. Photographing the composition at this stage can be helpful.
To construct your piece, I suggest that you sew your Fabrication by hand. A pleasing effect is attained this way. Sew through as many layers as you can. This will make your work more stable than if you sew layers one at a time, plus you will not be as likely to forget what goes where. Keep checking to make sure there is no puckering. Attach jewelry, slippers, shoes, belts, last. You might need to use a leather punch, awl, or thimble to attach some items.